Miss Brooke was present in LA where Kim Kardashian’s Makeup Artist, Mario, gave a 4-hour long, live, makeup tutorial on Kim herself!!! Lucky for us, B brought back some amazing tips! She shared them in a live video feed on Periscope, but here is a post detailing what we learned. 🙂
Note: this is NOT a “natural” makeup look, what-so-ever. Kim wears an astonishing amount of makeup, enough in fact, that she pretend hugs & kisses so as to not smudge her makeup perfection. SO, that being said, if you enjoy looking literally like a porcelain doll (like we at BB enjoy), this is an excellent application process for you! If you prefer the “less-is-more” avenue, this probably isn’t the route to take.
Let’s get started!!
1. MOISTURIZE. After you’ve washed your face, use our BB Skin: Moisture 20 to give your skin a supple start. Make sure to always moisturize not only your face, but your neck & decollete as well!
2. PRIME. We use 1 pump of the Camera Ready Primer to smooth out the skin, & protect our pores from the massive amount of product we will soon apply. Warm the primer in your hands & massage into every crevice of the face!
3. HD FOUNDATION. Apply a full base-layer of Hi-Def Foundation (that matches your skin color) to the whole face, including the lips & eyelids. Use your Beauty Blender (damp) to apply the foundation. Use a pressing/patting motion, start with the under-eye area, & working around the face. This is also used as the “eye-primer”.
4. EYESHADOW. Starting with the crease color, Titties, in this case – using a light hand, make a rainbow shape of eyeshadow just up under the brow bone, where the eyelid folds. Next, use S&M shadow in the outer corner. Still with a very light hand, apply this darker color in a C or V shape on the outer lid. (Helpful tips for this step: do not let the darker color go above the crease color, it’s designed to stay in the little pocket under where the eyelid folds. Also, start very light, then if you’d like it darker, add & blend slowly). Next, pack Heavens (or a highly shimmery shadow) onto the ball of the eyelid. We want this color to stay under the crease, & on the inner eyelid. Lastly, highlight the inner tear duct with BBtox #06.
5. EYELINER. Layers, layers, layers!! We used FOUR different eyeliners to create the perfect, long-lasting, black liner. Use Black Caviar gel pencil in the waterline first, from corner to corner. (Waterline is the wet part of your eyelid between your eyeball & your lash line). Use a tiny eyeliner brush to apply Black Caviar to upper lid lash line, & wing out the ends just a tinge. Use Black Tar pot eyeliner with the same small eyeliner brush next, brushing it right over top of the black caviar line on the upper lid. A couple layers of liquid liner comes now — use Onyx felt tipped liquid liner over the top of the Black Caviar & Black Tar, then use Tattoo brush tipped liquid liner over the top of those three as the final, perfecting step. Keep the upper lid liner nice & tight to the lash line, not Amy Winehouse style! Use the S&M shadow to smoke out the lower lash line, meaning: use a tiny brush to apply a small amount of eyeshadow just under the lower lash line from corner to corner.
6. EYEBROWS. Pick an eyeshadow that matches your hair color. In my case, we used Tig. With a small angled brush, line the under-side of the brow with eyeshadow, then trace the top-side of the brow. Fill in the inner-most part of the brow with a shade lighter pencil, for me, Taupe brow pencil. Use the Pot Concealer to trace around the lines you just drew to make the brow more defined. Let the concealer be thick around the brow until the rest of the face is finished.
7. MASCARA. Use False Lash mascara on the upper & lower eyelashes. Then do another layer with the Jet Black waterproof mascara. Make sure to get your mascara all the way from the root of the lash to the tip.
8. LASHES. Kim uses individual lashes every day. This is a lengthy process when it comes to time! We suggest getting eyelash extensions, or using strip eyelashes. For this lesson, we used individuals toward the outer part of the lash line. Longer lashes on the outside, shorter toward in the inside.
–Clean up the under-eye area with a remover before finishing the face — Don’t leave any shadow or wet mascara under the eye! —
9. CONCEALER. Use the Pot Concealer in a triangle shape under each eye. First, apply with a bigger sized concealer brush, & let it be THICK, then use your Beauty Blender to press concealer into skin. Next, use the Liquid Concealer over top of the pot concealer, & blend with Beauty Blender.
10. FOUNDATION. Use Cream Foundation (coming soon in singles form to BB!) with Beauty Blender all over the face, blending in the concealer around the eyebrows & under eye, as well as blending over ears & neck. Thick!!!
11. POWDER. Use the Dual Powder that matches your skin tone to set the foundations, all over. Apply with the beauty blender (should still be damp), & continue using a pressing motion so that the powder is set into the skin. Use the pressed Matte Your Face powder in the under eye area, then cake on the loose HD Mattifier over that.
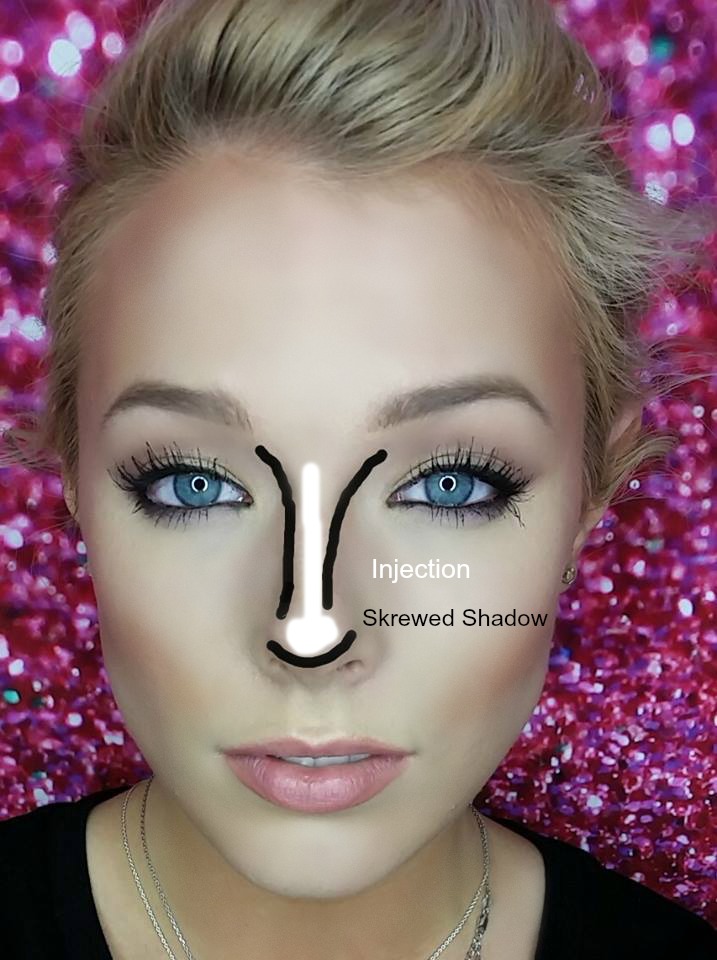
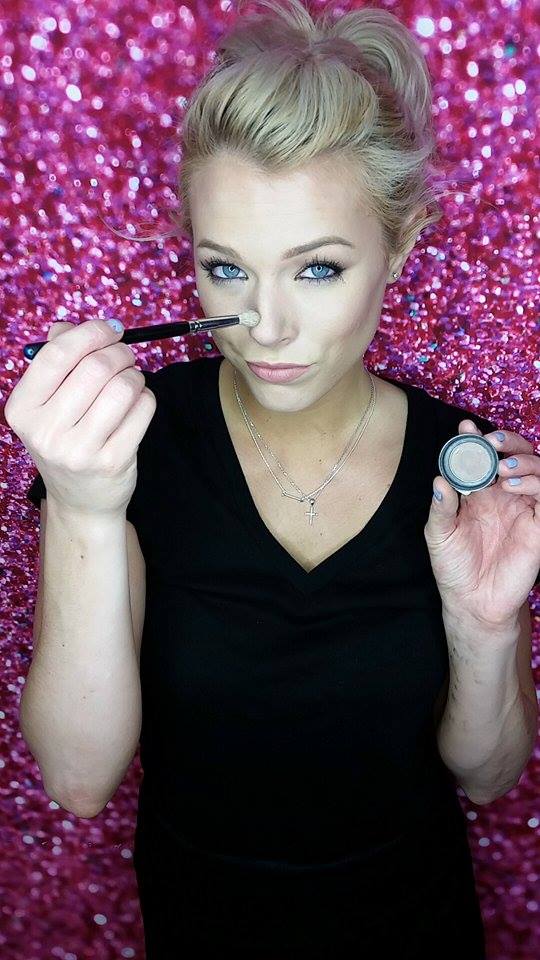
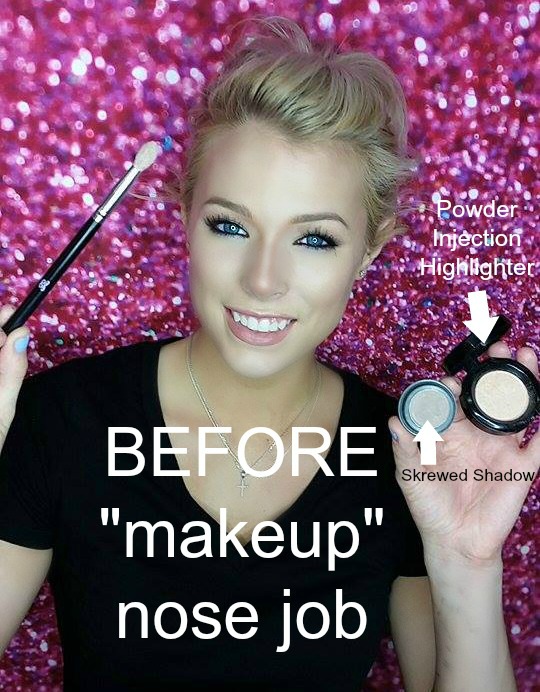
12. CONTOUR. Using a Chisel brush, apply Gold Bake bronzer up under the cheek bone (just like how we shadowed under the brow bone to provide an illusion of depth). It should look like a line under the cheek bone. Apply the bronzer in a defined line following the jaw line as well. Pull the bronzer toward the neck from this jaw line. This gives a “lift” to the jaw. Next, use a stipple brush to blend the bronzer under the jaw & under the cheek bone, & apply along the hair line as well. This motion resembles an “E-3” shape around the face. Kim likes peachy colored blush, so we chose Foreplay. Use the stipple brush to apply this blush to the meaty “apple” of the cheek. Sweep away the loose powder that’s still in the under-eye area, then use your Beauty Blender to pack all that’s been added into the skin. Use the stipple brush to apply Powder Injection to the tops of the cheeks (above the bronzer line) to give a glowy highlight. If you find you like your nose to appear smaller, use the bronzer with a small brush to line the sides of the nose (the closer together the lines are, the skinnier the nose looks) from your eyebrows all the way under the tip of the nose. Use the pressed matte powder to blend in these lines.
13. LIPS. Use Raisin lipliner to define the cupid’s bow (middle of upper lip), the corners of the lips, as well as the middle of the lower lip. The lipliner resembles a heart shape in the middle of the lips. Apply Fluer lipstick to the entire lip area, then top it with Naked Gloss.
“TA-DAH”!!!! Just like that, we are fully made-up & looking like perfection. If not, go back thru & perfect the blending, the lines, the lashes, whatever needs touching up. 🙂
You will find that this makeup application is VERY long-lasting, VERY matte, & very heavy! I personally love that.
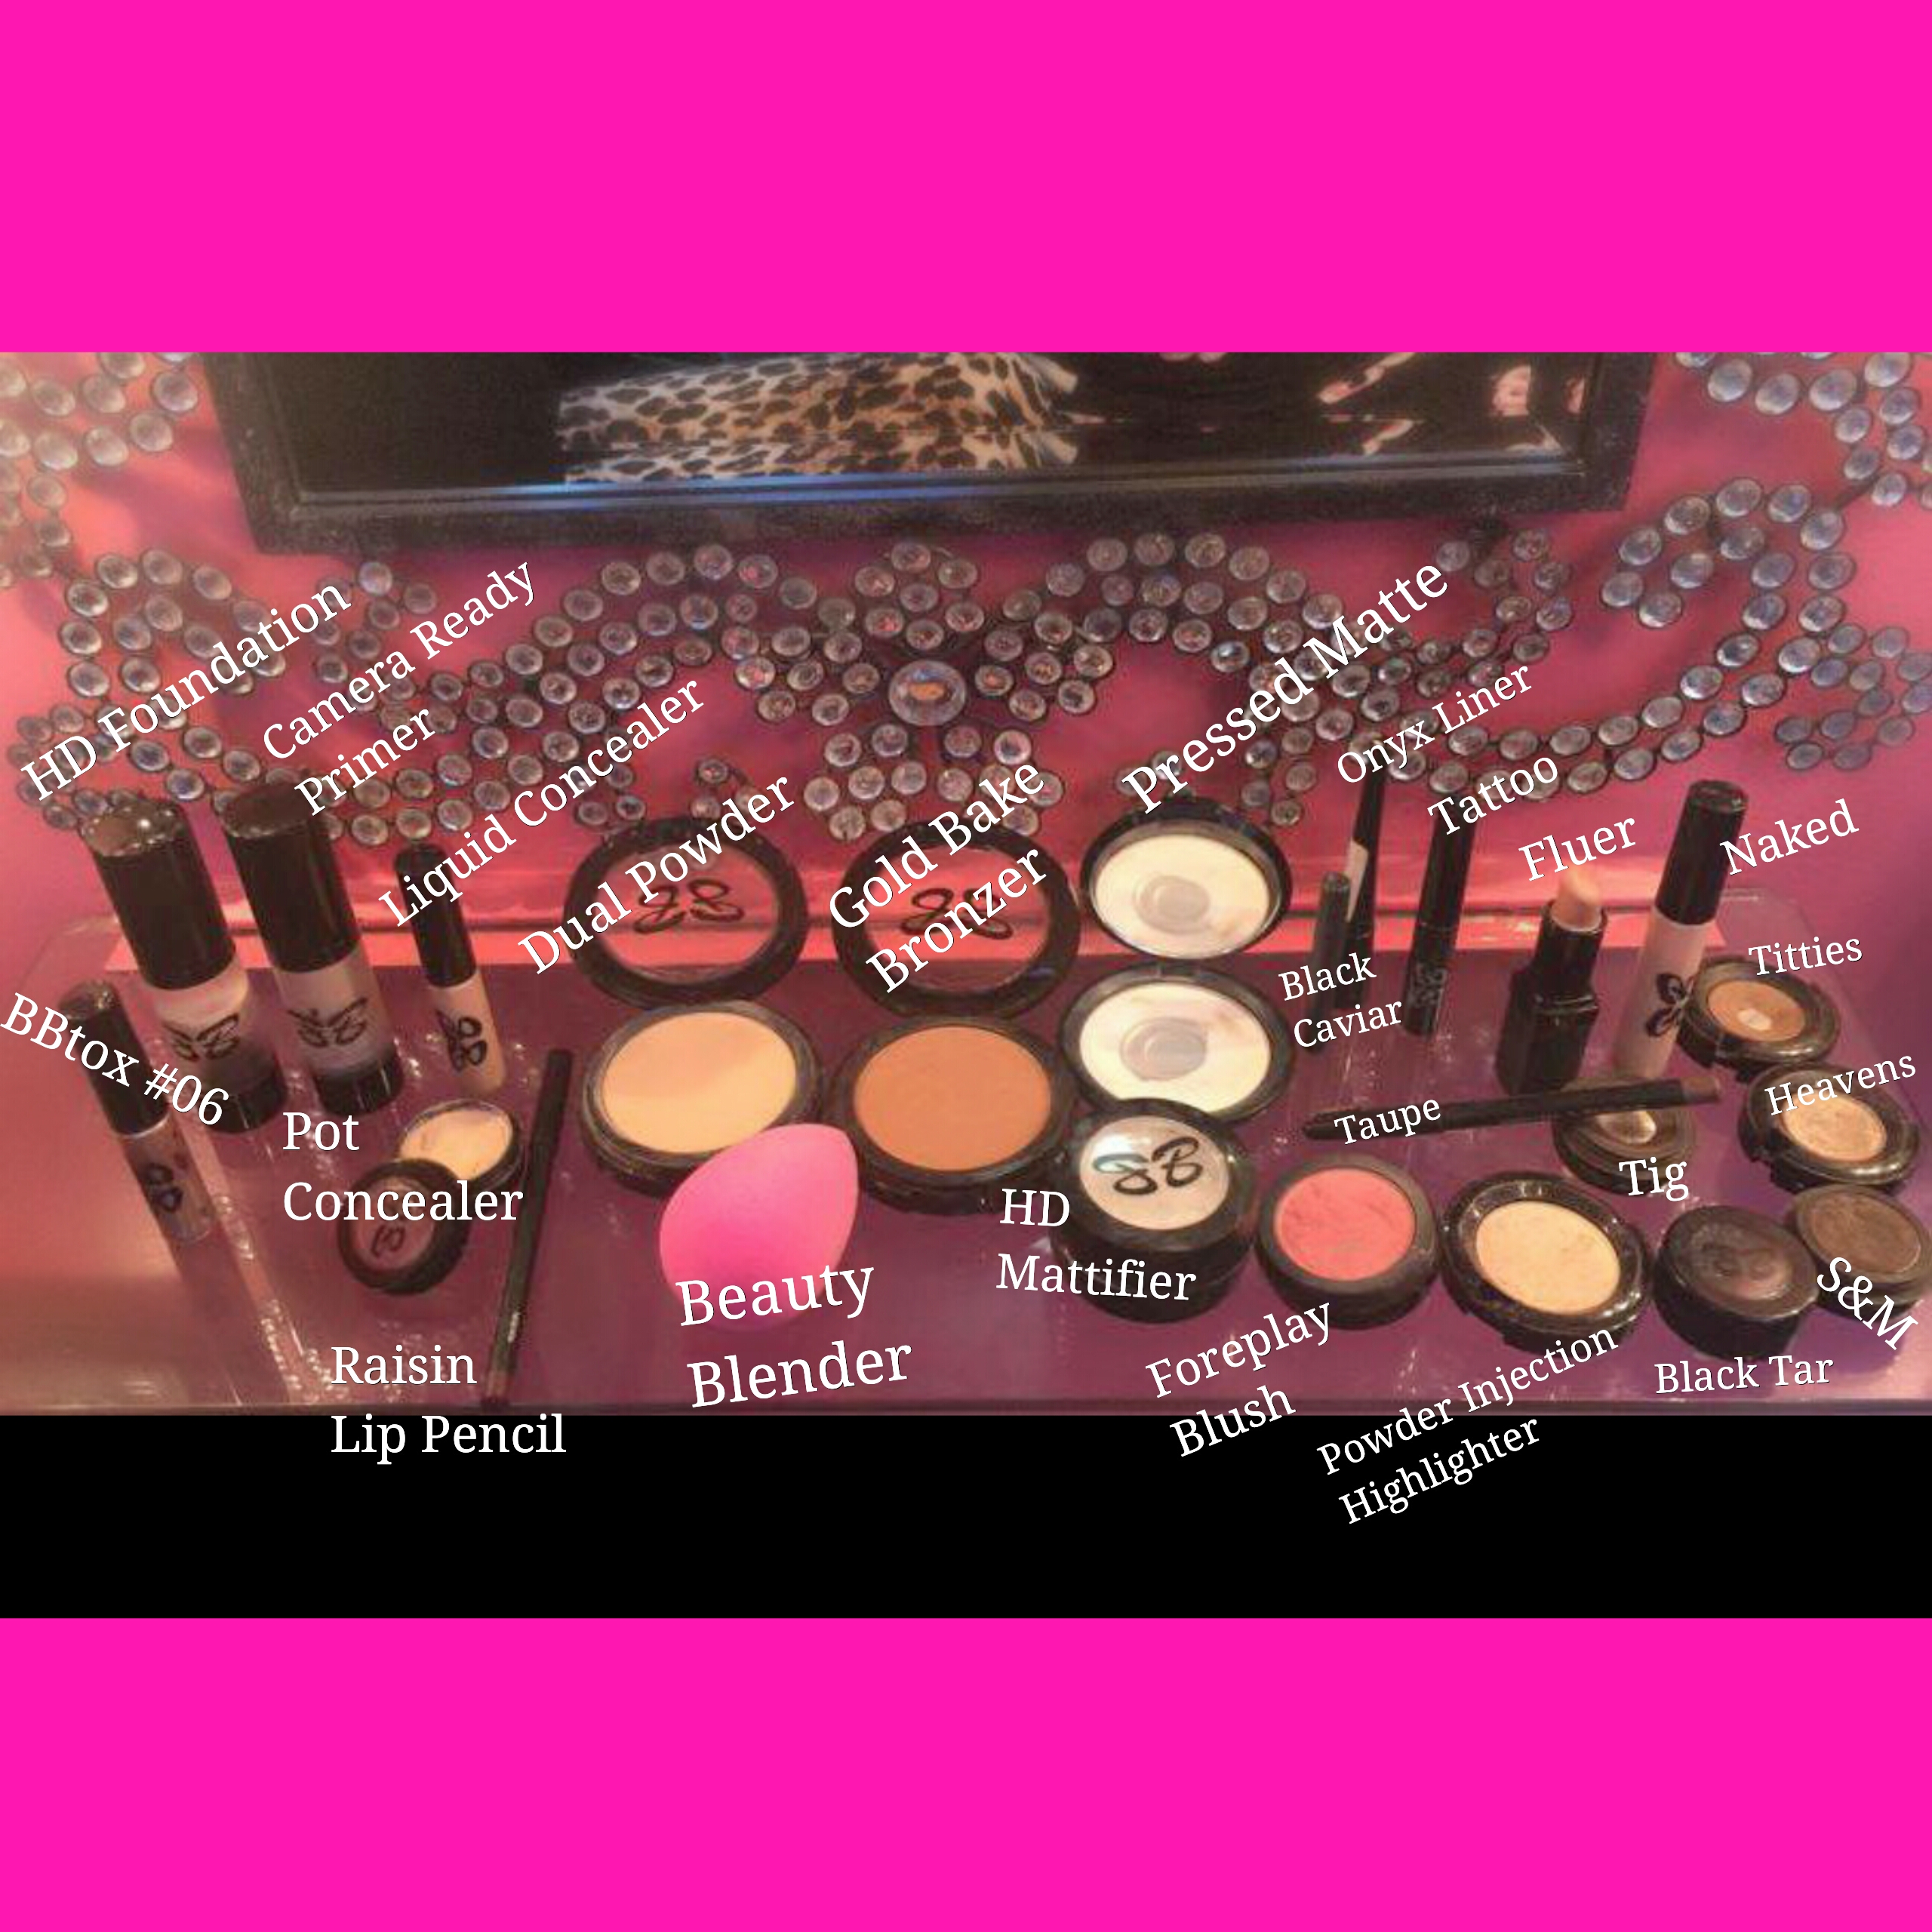
Buy any or all of the listed products HERE!
If you’d like to book this one-on-one lesson, Click HERE!
If you have any questions, please call!! 715-781-0248
LOVE, Jaimie @ BB Hudson. ♥

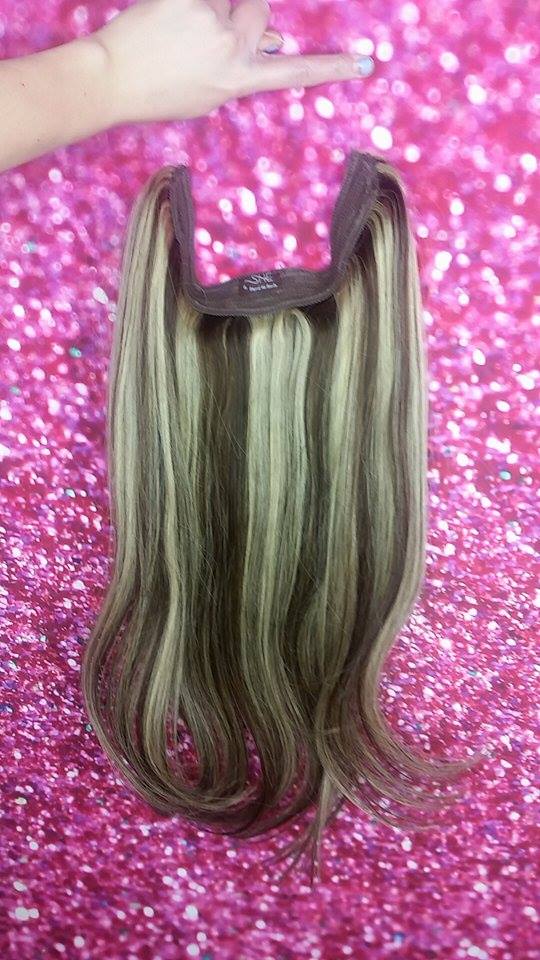
 BB HAIR EXTENSION IN BB DOLL’s head. #katiezimmerman #bbdollz #menomonie,wi #BBmakeupsalonspa
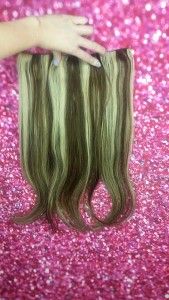